DIY Rope Leash Made From Clothesline for Your Dog
Did you know you can buy a clothesline at the local Dollar Tree store for just a buck? That makes this DIY Rope leash a beyond thrifty bargain. It is a lot more durable than the leashes you can find at the Dollar Store – and heck, this leash is better than some of the ones you find at the higher-end stores too!

I have the printable instructions and even tools list for you on this so if you ever wondered “How do you make a leash at home?” I have you covered.
DIY Dog Leash Made From Clothesline
Why would anyone even want to make their own leash? OK – other than the cool satisfaction of you knowing you did it yourself, you will end up with a sturdy leash that won’t break and you have your trusty pooch still by your side instead of running out into the street.
Eek!
Why are rope leashes better?
Is your dog a strong puller? I swear Tazuna thought that she was in the Iditerod Sled Race and needed to pull me around the block.
While a leather leash is durable and seen as more stylish, a rope leash is usually round instead of flat and very durable making it ideal for very strong or giant dogs.
Rope leashes are made to be strong and shock-absorbing, so your dog’s attempt to pull on their leash isn’t as successful as they are going for. The strength of this leash allows you to quickly gain back control of your pup, and end this pesky habit.
Soon you will be working together when you walk instead of against each other.
Dogs that pull on their leash while walking with you are a common problem seen among many different breeds. This problem can be seen in puppies as well as adult dogs. Dogs that pull on their leash while you walk this is more than just aggravating. If the leash breaks, the dog could run and put itself or others in danger. You should want to walk your dog, not have it walking you.
Why do dogs pull on the leash?
There are a number of different reasons why your dog will pull on the leash. Some dogs are so happy to go for a walk that they are out of control, and are anxious to move about. Other dogs see themselves as being the leader and will move forward with force because they feel that they are moving ahead of the pack. If your dog is very happy about going out, it may help to give them some time to calm down. You can stand still with the dog for a few minutes until they become more relaxed.
If the dog feels that it is the leader, this is a sign that you should begin training him. The owner has to show the dog that they are the leader. When you don’t have this understanding with your dog, it will be impossible to train them properly. If your dog shows signs of control, it is best to go back to simple obedience training. If you don’t have the time to train the dog yourself, it may be best to send them to a dog training school.
The instructor can train you as well as your dog, and they can show you how to keep the dog from trying to be the leader. Skilled instructors should always work with both you and your dog. The first step in getting the dog not to pull on the leash is to get it to accept the collar.
If the dog is moving around a lot while you are trying to put on the collar, this is a sign that your dog will pull against the leash. Start by commanding your dog to sit or stay while you put on the collar. If the dog gets up after you’ve put on the collar, make him sit back down quickly.
You should only walk the dog after it sits down calmly and allows you to put on the collar and leash. Once the collar is on, don’t allow the dog to jump up and rush ahead towards the door. Gently pull back on the leash. Make him sit back down again, and repeat the process until he gets the message.
Baby steps people, it won’t change overnight.
Why retractable leashes are bad
Well, it teaches the dog to pull on the leash, LOL. They HAVE to in order to get to what they are going at and with an average of 20′ of leash? That pup is often too far away from you if any sort of danger or situation occurs.
Retractable leashes are simply too long for their own good – and yours!
You don’t need to know how to sew a leash
This is basically a macrame project so you are using a rope and tying knots into it. I swear – no hand sewing or machine sewing is needed. This is only a 2-foot-long leash but takes about an hour to make. You CAN make it longer, just use a longer section of rope!
You can get the rope at your local dollar store instead of making a DIY paracord leash and having to invest more money. I DO suggest getting a heavy-duty snap though because your soon-to-be former puller can probably break the cheap ones. I found them on Amazon.
How do you make a DIY rope leash?
First, you will need a few things:
DIY Rope Leash Made From Clothesline Supplies Needed:

- 30 feet of cotton-poly blend clothesline – reminder: this makes a TWO FOOT LONG leash – if you want a 4-foot-long leash, you would double that – triple it for a 6-foot-long leash.
- Scissors
- (1) Dog Snap
Note: This makes a leash that is about 2 feet long when done. If you want a longer leash, just use a longer line. You just want to be sure that the outside part of the line is about five times longer than the center part of the line.
DIY Dog Leash Instructions:
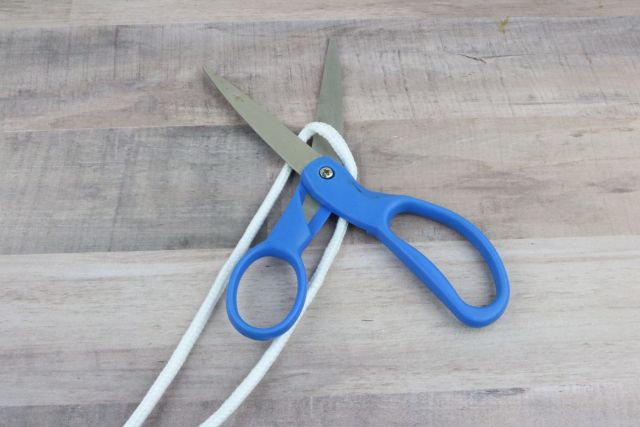
Step 1: Start by cutting the 30 feet of line in half.
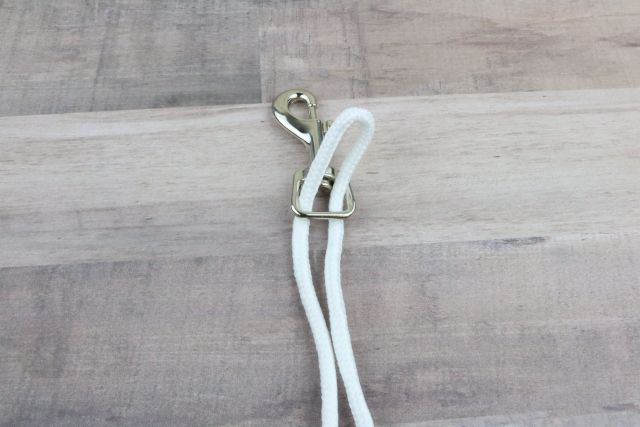
Step 2: Take one piece and fold it so there is about 30 inches on one side with the rest on the other. Then push the loop through the hook. Make sure you have it so the 30-inch line is in the center of the hook and not the outside.

Step 3: Then run the ends of the line through that loop.

Step 4: Pull the ends until the line/loop is tight on the hook to hold it in place.

Step 5: Do the same with the other line. Make sure that the 30 inch side is in the center with the other one.

Step 6: Take the outer line on the right and run it behind all the others so that there is a loop on the right. Then take the line on the left and run it over top them all so there is a loop on the left. Take the top line and run it through the loop on the right and the bottom line pull it through the loop on the left.

Step 7: Pull both lines so they are nice and tight.

Step 8: Keep repeating steps 6 & 7.

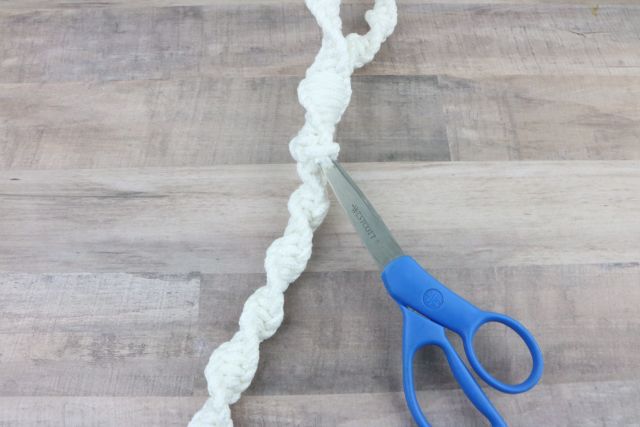
Step 9: Should look like the picture when you have done about 13 ties. As you go it will start to twist on its own.

Step 10: Stop when you get almost the ends of the center lines. The ones that are 30 inches.

Step 11: Fold the end over to form a handle. I made my handle about 4 inches or so. Run the long ends through the side loops of the leash to join the handle to the leash.

Step 12: Now do steps 6 & 7. This time we will not only be covering over the small parts of the centerline that are left, but we will also be wrapping the leash as well.

Step 13: Keep repeating the steps until you have about 6 inches or so of line left. Should be about 8-10 knots.

Step 14: Tightly tie the two lines together.

Step 15: Cut off the ends so that it is about an inch long.
Step 16: Take the ends of the scissors or another like object and tuck the ends under the knots you just made to hide them.
Just look at this beautiful DIY Dog Leash!
Like our DIY Rope Leash? Try these other articles:
- How to Reduce Dog Shedding: Tips From an Expert
- Is Vegetable Oil Harmful To Your Dog? Here’s What You Need to Know
- Australian Shepherd Colors: A Friendly Guide to Every Shade
- Best Dog Shampoo For An Australian Shepherd: Gentle, Coat-Boosting Picks You’ll Love
- Collar Size For An Australian Shepherd Puppy: A Simple Guide For The Perfect Fit