Nutter Butter Dog Face Cookies for Hoomans: A Tutorial
If you are looking for a new recipe to try this year, I recommend trying dog face cookies. They’re easy to make and kids will love them! In the following tutorial, I show you how I made these cute doggie cookies with Nutter Butter Cookies as a base.

We have done so many treats FOR dogs, these are treats for people that LOOK like dogs!
I know right now you are thinking, great, another dessert! But not so fast. These dog face cookies are SUPER easy to make. So let’s get started with a recipe for these doggie cookies that your kids will LOVE!
We did a Puppy Party for Miss Sarah when she turned four and it was adorable. These cookies would make for a delightful addition to any such festivities, even if we had “pupcakes” that day.
You can read all about what we did for that dog-themed birthday party on our main site, and how instead of gifts, she asked for donation items on the local Humane Society List.
Nutter Butter Dog Cookies
First, we need some Nutter Butter Cookies. Yes, these have peanut butter- so make sure anyone with a peanut allergy does NOT try these.
Peanut allergies can be caused by eating peanuts or being exposed to peanut dust in the air. It is a very common allergy that affects millions of people, with severe reactions occurring after exposure to as little as two grams of peanuts!
In some cases, even touching someone who has eaten nuts may lead to an allergic reaction.
Soooo, know your audience before you actually bring these to an event or school.
Dog Nutter Butter Cookies
This recipe will make 5 dog face cookies- you can easily double or triple the batch to make an entire litter or be ready to host your own Puppy Party!
While I used yellow, brown, and black melting chocolate to make these, pretty much any colors can be created using a base white melting chocolate and blending in a tiny amount of coloring. Just make sure it is chocolate coloring, specifically.
Dog Face Cookies Ingredients List:

- ¼ cup yellow melting chocolates
- ¼ cup brown melting chocolates
- 3 tbsp black melting chocolates
- ¼ tsp coconut oil
- candy eyes
Additional items you will need:
Ramekins – Ramekins are small dishes that have a flared rim and can be used to make individual servings of food. They are typically made out of ceramic, porcelain, or other heat-resistant materials. A typical ramekin size for baking is four ounces (120 milliliters). We love these Ramekins on Amazon.
A double boiler set up – A double boiler is a cooking utensil consisting of two heat-proof containers, the upper one smaller than the lower. The water simmers in the top container and cooks or melts ingredients inside, while steam condenses on cooler surfaces below. This one is a bargain on Amazon and works on most pots or pans.
Piping cones – 100 Piece Pastry Bags: Simple, affordable and will get the job done. Piping bags can make a huge impact on the outcome of your culinary creation, so why settle for less if you can have the Zulay Kitchen Pastry Bags? Made to be outstanding and reliable throughout your decorating task- courtesy of its upgraded and thickened bags that won’t burst or rip when in use.
Chocolate dipping wand or fork – A chocolate dipping wand is a long, thin metal or wooden rod that one dips into melted chocolate and then uses to coat an item such as fruit. A fork can be used in the same way but provides less control when coating items with chocolate. If you are looking at doing other fun chocolate items, this candy tool set on Amazon is a great value.
A Wire cooling rack – Non-stick wire cooling racks allow excess candy to drip down and away from the surface of your decorated sweets. This also makes it easier for you to work on them as they’re propped up in front of you, at a kitchen counter or table edge. These are a great set on Amazon and will do wonders for your normal baked goods, too!
Parchment paper and Toothpicks
How to assemble your Nutter Butter dog face cookies:
Set up a double boiler with a shallow pan and ramekins for each color chocolate. Fill with water till half the way up the side of ramekins. Be careful not to get water inside them as it will seize the chocolate. Turn heat to medium-low.
What does it mean to seize the chocolate?
When the chocolate is heated, it melts into a sauce. When that happens to either of these chocolates (or any other type), they will harden in an unusable state and be ruined.
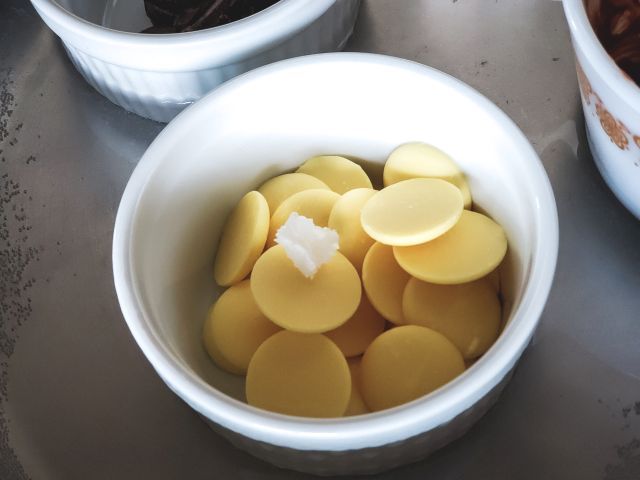
Add chocolates and a smidge of coconut oil to each, stirring to combine as they melt. You can easily create variations in the brown color by adding 1 chocolate piece to white or black to lighten or darken.
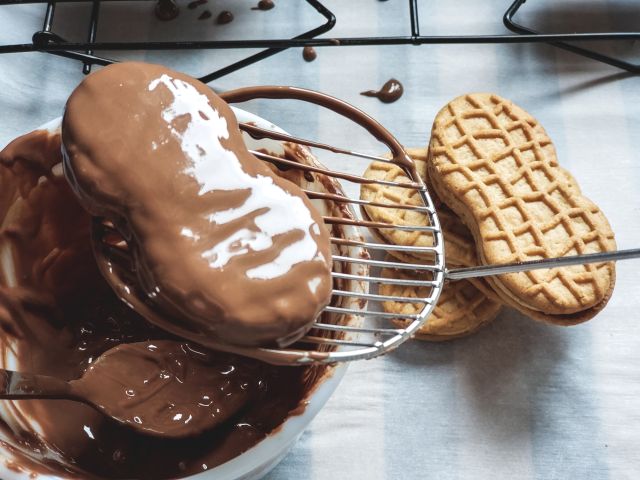
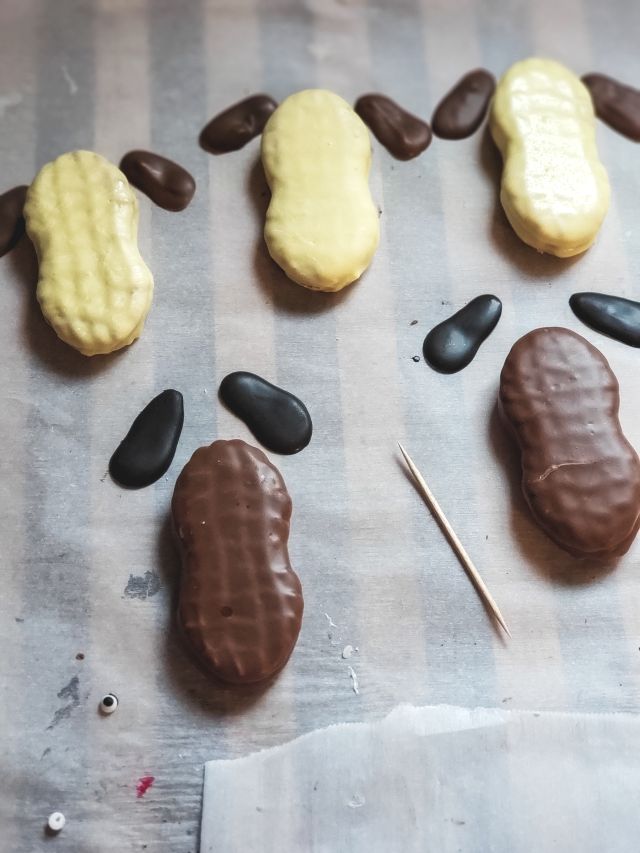
Using a wand or fork, dip the Nutter Butter cookies in yellow or brown chocolate until thoroughly coated. Hover above the dish as chocolate drips off.
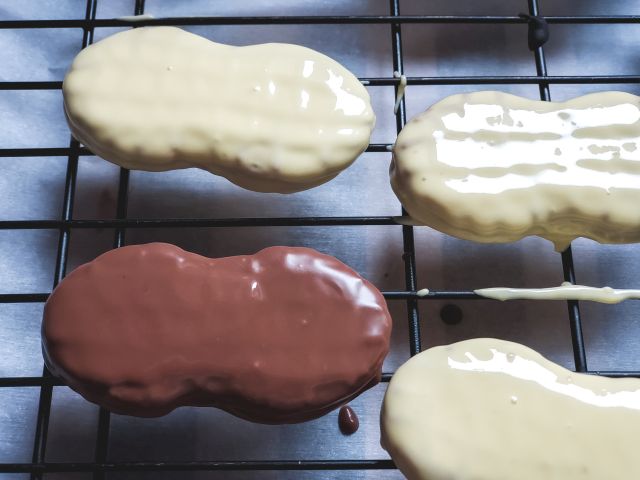
Set on a wire rack for them to harden.

To create the dog ears, tear off a strip of parchment paper. Place a Nutter Butter on the paper and hand draw ears with a pencil.
Fill pencil drawings with chocolate by using a piping bag or forming the shape with a toothpick. Make several of these so you have extra and put them in the refrigerator to harden.
Attach your chocolate ears by dabbing toothpick in brown or yellow chocolate and, again, using it as glue to adhere your dog ears to the cookie base.

Add eyes to your Nutter Butter dogs by dipping a toothpick into the base color chocolate (brown or yellow) and placing a dot on the face where you want the eyes to be. Quickly place candy eyes on, before the chocolate “glue” hardens.
Set the dog Nutter Butter cookie aside to dry and harden. Then, store these canine beauties in an airtight container until you are ready to share them.
Other articles we think you may like:
- Best Dog Breeds for Hiking Off Leash: Top Dogs
- Leash Train a Pulling Dog: A Clear Guide
- Stop Reverse Sneezing in Dogs: What Causes It
- Why Does My Dog Freak Out When I Hug Someone: Understanding Canine Anxiety Triggers
- Is it Too Late to Potty Train My Dog? Expert Advice on Training Adult Dogs